Show summary Hide summary
Tired of the high price tags on stylish planters? You can make sturdy, modern concrete containers at home without expensive molds. With a simple plastic bin, damp sand, and a premixed mortar, you’ll create custom planters that rival store-bought designs. This method is cheap, forgiving for beginners, and produces chic results you can personalize.
Why homemade concrete planters are worth the effort
Concrete planters are durable, weather-resistant, and suit many decor styles. Buying designer pots can cost hundreds. DIY lets you choose size, shape, and texture for a fraction of the price. Using a plastic bin as a mold gives you a textured, ready-made form in minutes. That woven basket pattern becomes a professional interior finish.
Target wall-mounted find frees up countertop space: timeless style for small kitchens
Budget backyard makeover: turn an old laundry hamper into a cement planter
Essential materials and budget-friendly options
Gather items you likely can find at a hardware store and a dollar shop. These materials keep costs low while delivering lasting planters.
- Premixed mortar: A preblended product such as Sakrete Gray Type S Mortar is ideal. It only needs water and offers about 60 minutes of workable time.
- Plastic bin: Use a slotted storage basket or similar plastic container. Dollar stores sell these for about $1.50.
- Sand: Play or construction sand that holds moisture will work. No specialty sand required.
- PVC pipe: A short piece of 3/4-inch PVC creates a reliable drainage hole.
- Mixing tools and safety gear: A trowel, bucket or drill paddle for mixing, gloves, and a respirator mask.
Preparing a sand mold with a plastic bin
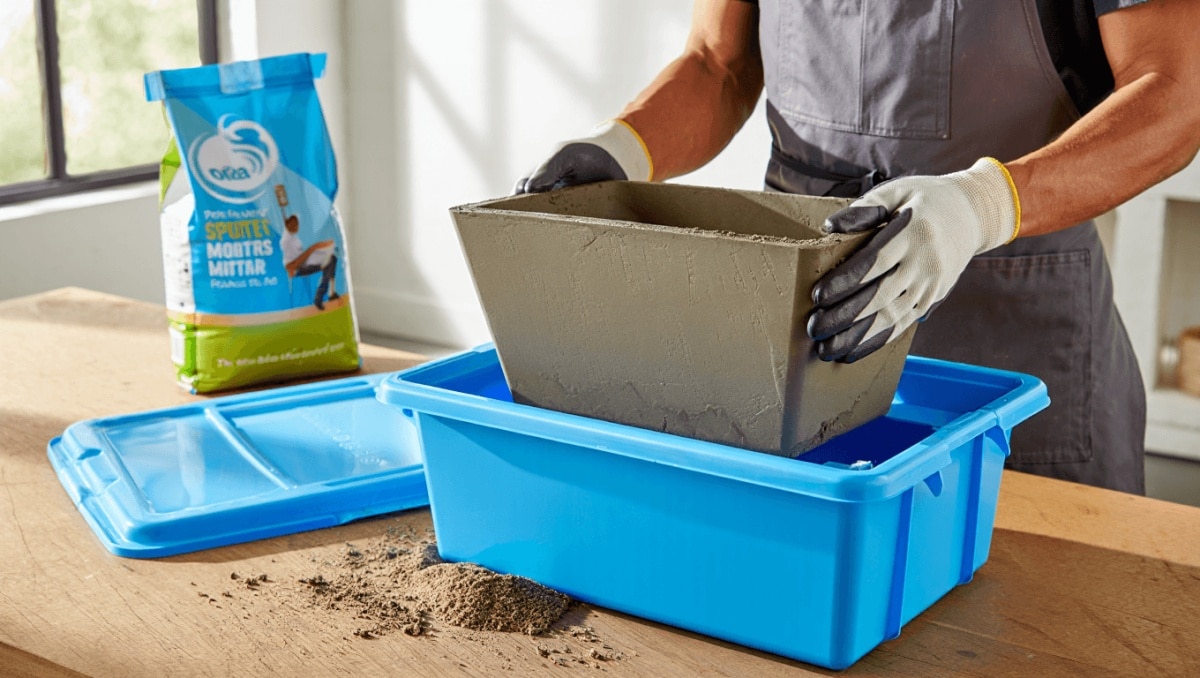
Creating a sand mold is the trick that makes this project so simple. The sand forms the inner cavity and supports the wet concrete while it cures.
- Moisten the sand until it holds shape like a sandcastle. It should be damp but not dripping.
- Pack the sand tightly into the plastic bin, filling every corner. Press and tamp to remove air pockets.
- Smooth the top level with the rim and flip the bin onto a protected, flat surface.
- Lift the bin away carefully to reveal a solid rectangular sand block with the bin’s texture imprinted.
- Refine the edges by smoothing or rounding them for the desired look.
Tip: Once you master one shape, you can experiment with bowls, trays, and layered forms using different containers.
Mixing and applying concrete safely
Concrete is caustic when fresh. Protect your skin, eyes, and lungs. Wear gloves and a mask. Work in a ventilated space.
- Mix the mortar to a creamy, spreadable consistency. Use a drill with a paddle or mix by hand.
- Apply a generous layer of concrete to the sand mold’s top and sides with a trowel.
- Build the coating to your desired thickness. Thicker walls mean heavier, stronger planters.
- Smooth seams and fill any gaps for a clean finish.
Creating drainage and curing the planter
Proper drainage protects plant roots and prevents water buildup. Insert a short piece of PVC while the concrete is still workable.
- Press the 3/4-inch PVC pipe through the concrete straight into the sand mold.
- Apply gentle, steady pressure so the pipe reaches but does not disturb the sand core.
- Let the concrete set and cure according to the mortar instructions. Curing time varies with product and weather.
- After curing, invert the piece, scoop out the sand, and remove the PVC to reveal a clean hole.
Finishing touches and planting tips
Once the sand is removed you can refine the planter and get it ready for soil and plants.
- Brush or rinse the interior to remove loose sand.
- Smooth rough spots with fine sandpaper or a damp sponge.
- Seal the concrete if you want to reduce moisture absorption. Use an outdoor sealer for planted containers.
- Choose well-draining potting mix and plants suited to container life.
With a little practice, each planter becomes a custom piece for your porch, patio, or living room. Experiment with sizes, pigments, and textures to make one-of-a-kind pots.