Show summary Hide summary
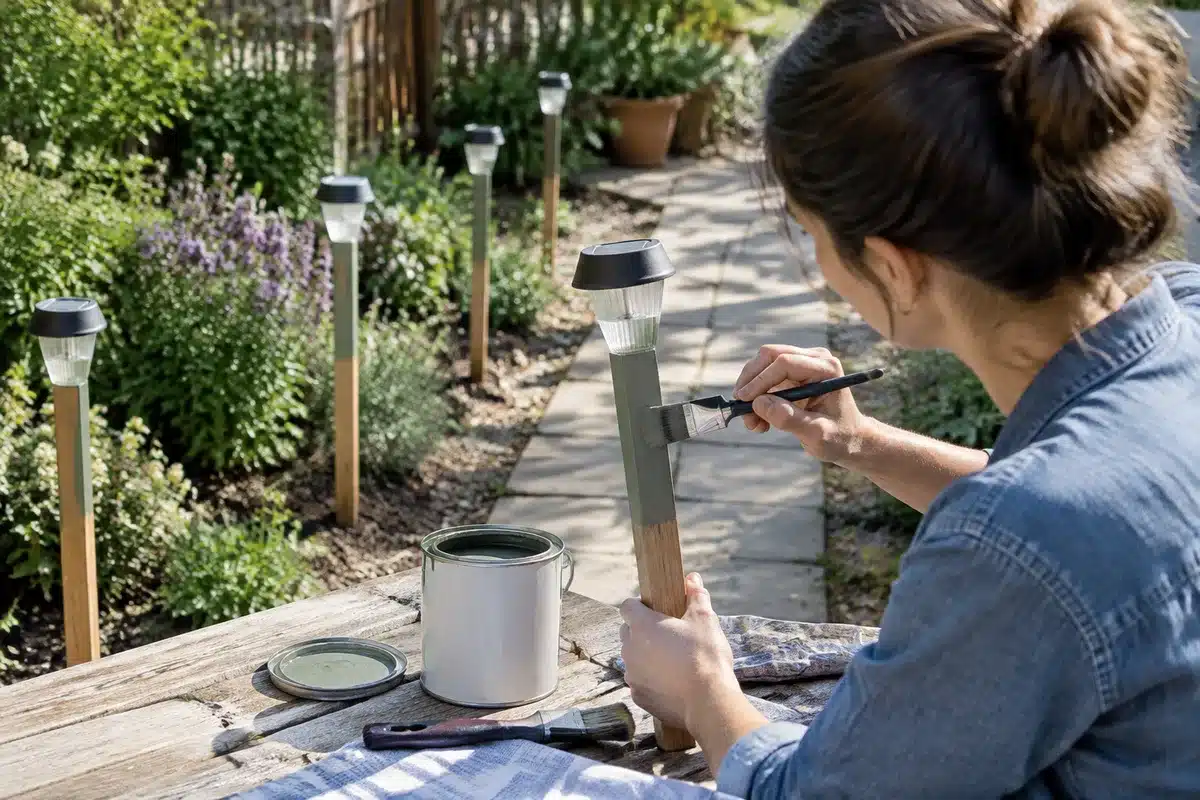
If your yard disappears when the sun goes down, you don’t need an expensive overhaul to fix it. A simple, crafty upgrade using Dollar Tree solar stake lights and basic wooden dowels can lift cheap fixtures into sleek pathway or garden accents. The trick is quick, budget-friendly, and ideal for anyone who likes practical projects that actually improve a space.
Why this low-cost upgrade makes sense for outdoor lighting
Dollar Tree solar lights: easy DIY hack to make them shine brighter
Gravel driveway edging keeps grass out: durable, low-maintenance options that look great
Many store-bought solar stakes are small and close to the ground. Adding a wooden dowel raises the light higher for better coverage. This change improves visibility and gives the fixtures a more modern silhouette.

Each upgraded light can cost under $5 when you combine a Dollar Tree solar stake with an inexpensive wood dowel and a can of spray paint. It’s a scalable solution: make two, a dozen, or enough to outline a path.
Materials and quick shopping list for the project
- Dollar Tree solar stake lights (seasonal or standard styles).
- Wooden dowels, thin enough to fit inside the light’s hollow stake.
- Outdoor spray paint (use Rust-Oleum or similar for coverage and protection).
- Optional: stemless glasses or small display boxes for decorative covers.
- Garden water source or a tool to soften compacted soil for insertion.
Prices vary by store, but expect the full conversion to remain very affordable.
Step-by-step: how to attach a dowel to a solar stake
- Paint the dowel first. Use an outdoor formula that adds a weatherproof seal.
- Allow paint to dry for at least 20 minutes, or follow the paint can directions.
- Soften the ground if needed by watering the spot for easier insertion.
- Push the dowel into the soil. Aim to bury about one-third of its length for stability.
- Slide the solar stake over the exposed dowel. The fit should be snug without glue.
- Adjust the height and orientation so the solar panel faces sunlight.
If the ground is rocky or compacted, use a pilot hole and consider a slightly thicker dowel for sturdier support.

Creative styling and placement ideas for your garden lights
Think beyond one uniform row. These upgraded lights work well in multiple layouts.
- Line walkways with even spacing—about 6 to 8 feet apart—for balanced illumination.
- Group three to five lights together at varied heights for a sculptural cluster.
- Paint some dowels in bright hues for a playful display near patios or play areas.
- Use inverted stemless glasses or small display boxes as covers for a polished look.
- Mix taller dowels with standard stakes to create depth across beds and borders.
Small changes like color or height variation transform utility lights into design features.
Maintenance, weatherproofing, and battery tips
To keep these DIY lights performing, a few simple habits extend life and brightness.
- Choose an outdoor spray paint that also seals against moisture and humidity.
- Wipe solar panels occasionally to remove dust and debris that block sunlight.
- Replace rechargeable batteries each season if light output decreases.
- Store fragile display covers indoors during storms or winter to prevent cracking.
Battery care and seasonal storage
Rechargeable AA or AAA cells in solar stakes lose capacity over time. Swap them yearly if you depend on the lights for safety. In colder climates, bring the lights indoors during deep freezes to preserve plastic components and batteries.