
Show summary Hide summary
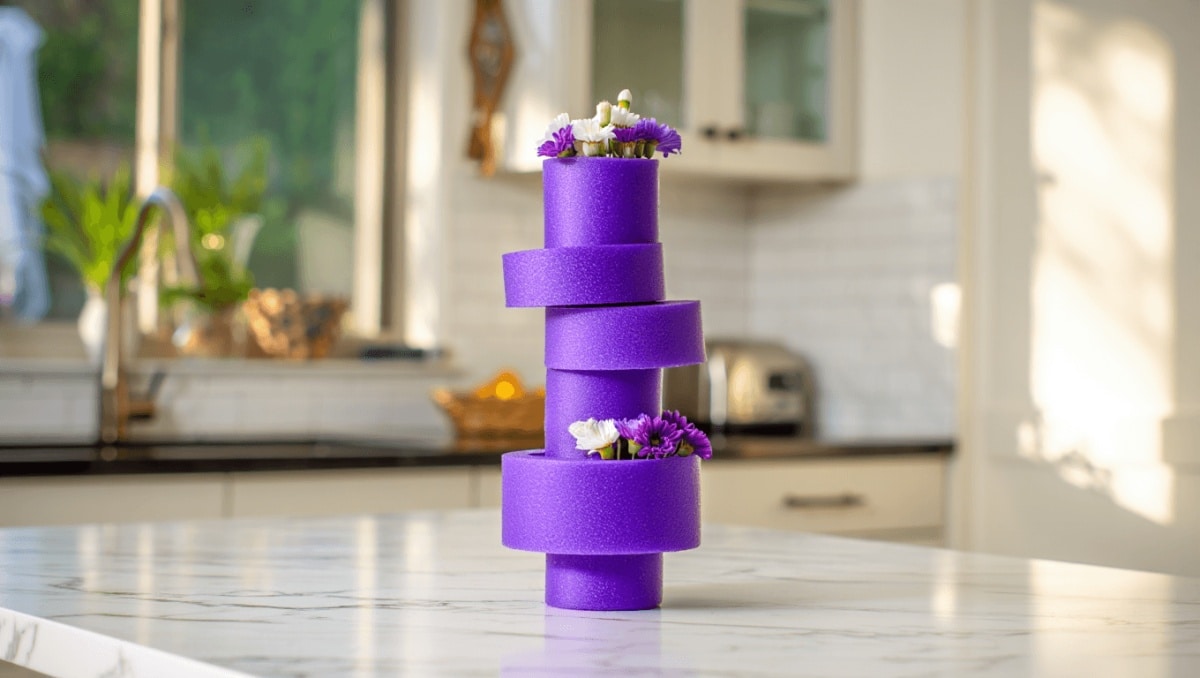
Transforming a humble pool noodle into a chic vase is easier than it sounds. With a few common tools, some spray paint, and a splash of creativity, you can make a stacked vessel that looks designer-made. This guide walks you through the supplies, step-by-step construction, painting tips, and styling ideas to turn foam scraps into budget-friendly decor.
What you’ll need to make a budget-friendly DIY vase
- One pool noodle or leftover pieces from past projects.
- A cylindrical base: a cardboard tube, an old vase, or a tall canister.
- Hot glue gun and glue sticks for secure attachment.
- A sharp utility knife or craft blade for clean cuts.
- Masking tape or strong parcel tape to hold seams while gluing.
- Spray paint safe for plastics (water- or latex-based).
- Optional embellishments: beaded garland, rhinestones, faux pearls, tassels.
- Fine-grit sandpaper, damp cloth, and gloves for prep and safe handling.
Michaels holiday finds under $25: 20 new gifts that look like $50
Target wall-mounted find frees up countertop space: timeless style for small kitchens
Preparing the noodle and planning your shape
Begin by wrapping the noodle around your chosen base. That quick test shows you how many rings you need and where to cut. Trace the overlap point with a marker. Then lengthwise-slice the noodle where it meets the base to create sections.
Decide whether you want a uniform stack or a tiered silhouette. Varying the lengths creates a bottleneck or tiered effect. For a modern, minimal look, keep pieces similar in size.
Step-by-step assembly for a sturdy stacked vase
- Cut three to four noodle segments using your marked measurements.
- Sand lightly and wipe each piece to remove dust and oils.
- Make a small slit in each ring to fit over the cardboard base.
- Use tape to temporarily seal the foam ends and slide them onto the base.
- Apply hot glue to the seam and press the ends together for a permanent bond.
- Stack the rings until the desired height is reached.
- Add extra glue between layers if the stack needs reinforcement.
Painting tips to get a seamless, high-end finish
Not all spray paints play well with foam. Choose a water- or latex-based spray paint labeled safe for plastics. Avoid enamel and lacquer, which can melt foam over time.
Prep for better adhesion
- Wipe the foam with a damp cloth and let it dry fully.
- Lightly sand the surface so paint grips the foam.
- Work in a ventilated area and shake the paint can thoroughly.
Application technique
- Spray in thin, even coats from about 8–12 inches away.
- Paint horizontally while rotating the vase for a smooth look.
- Allow ample drying time between coats to prevent drips.
If you can’t confirm water-based labeling, pick a spray formulated for plastics such as Krylon ColorMaxx. Patience during drying is key to a professional result.
Simple ways to style and elevate the finished piece
Once painted and cured, your foam vase becomes a blank canvas. Add embellishments or leave it sleek.
- Glue a beaded garland around a seam for texture.
- Affix rhinestones or pearls to lure light and add sparkle.
- Tie a tassel at the neck for a boho or rustic vibe.
- For minimal decor, keep the painted surface clean and pair it with sculptural faux branches.
Use artificial flowers only. A cardboard or foam core base won’t withstand standing water. Faux stems keep the look fresh and damage-free.
Safety and longevity tips for foam vases
- Handle the utility knife carefully and cut on a stable surface.
- Wear gloves when using hot glue and spray paint.
- Keep the vase away from heat sources and direct sunlight to prevent warping.
- If you must store the piece, wrap it loosely so embellishments don’t crush.










