
Show summary Hide summary
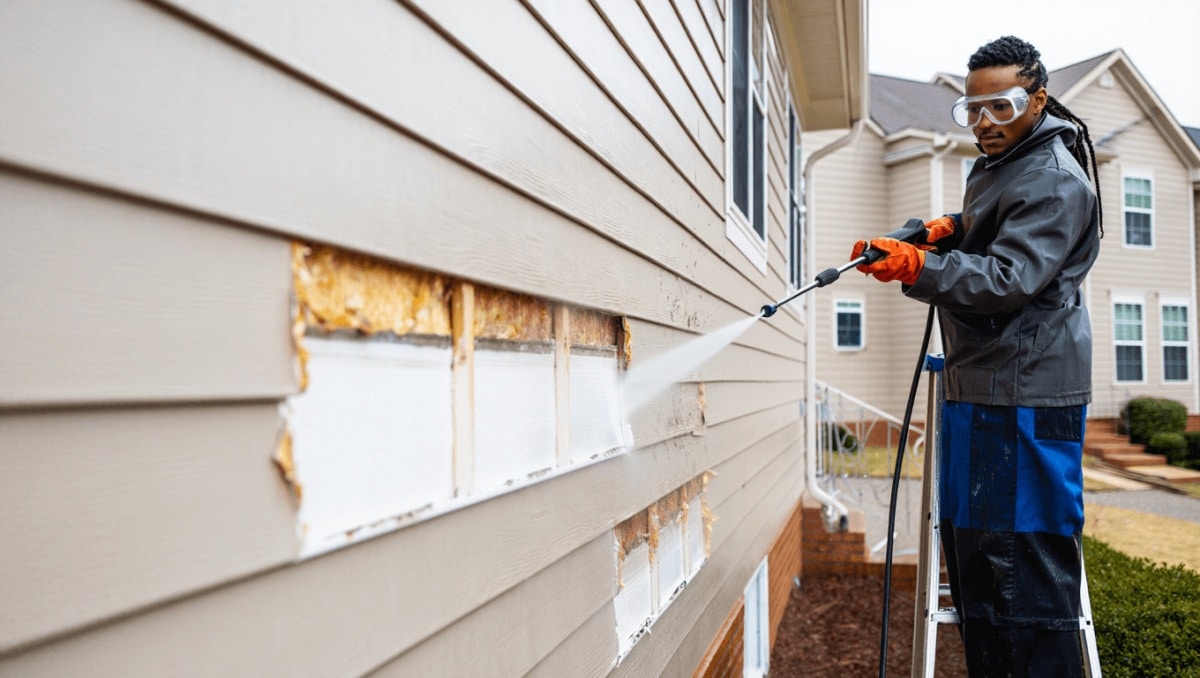
When dirt, pollen, and algae coat your home, grabbing a pressure washer feels like a quick fix. But that powerful spray can do more harm than good on vinyl siding. Before you launch into a weekend cleanup, learn why strong pressure can create costly problems and what safer cleaning methods will restore curb appeal without risking damage.
How pressure washers can damage vinyl siding and your home
Vinyl is popular because it’s affordable and resists surface water. Still, it isn’t invincible. High-pressure water can deform panels, chip edges, and force moisture into seams.
Michaels holiday finds under $25: 20 new gifts that look like $50
Target wall-mounted find frees up countertop space: timeless style for small kitchens
- Warping and cracking: Concentrated jets can bend or crack thin vinyl, especially older or darker-colored pieces.
- Water intrusion: A hard spray can push water behind siding and into the sheathing, which leads to rot and mold growth.
- Trim and seal damage: Window casing, soffits, and flashing can be compromised, creating new leak pathways.
- Hidden, costly repairs: Surface cleanliness may hide interior damage that shows up months later as rot or staining.
Even if the exterior looks perfect after power washing, moisture trapped behind panels can cause expensive repairs down the road.
Why soft washing is a safer option for vinyl siding
Soft washing uses low pressure plus cleaning agents to remove grime and mildew without blasting the building envelope. It’s designed to dissolve stains rather than shear them off.
Compared with a high-PSI stream, soft washing reduces the chance of pushing water into joints or stripping paint from trim.
Common soft-wash approaches and products
- Low-pressure nozzle on a pressure washer or a dedicated soft-wash pump system.
- Oxygen-based cleaners (non-bleach) for general dirt.
- Trisodium phosphate (TSP) for stubborn grime.
- Sodium hypochlorite (diluted bleach) for mildew and algae, used carefully to protect plants.
- Commercial house cleaners such as oxygenated Simple Green formulas.
Follow the siding manufacturer’s guidance before using any chemical. Some warranties require specific cleaning methods.
Safe step-by-step cleaning routine for vinyl siding
Use this checklist to reduce risk and get predictable results.
- Inspect siding for cracks, loose panels, or gaps. Repair before cleaning.
- Test a small patch with your chosen cleaner and rinse to confirm no damage.
- Shield plants and outdoor electrical fixtures with plastic sheets.
- Choose a wide-angle nozzle and keep the wand at a distance of 3–6 feet.
- Spray downward, not upward into seams or trim.
- Maintain a gentle sweeping motion; avoid a fixed, concentrated spray.
- Spot-clean tough areas with a soft-bristle brush and cleaner before rinsing.
- Finish with a light garden-hose rinse to remove residues.
Never use a narrow jet or the highest PSI setting on vinyl siding. Those settings are made for concrete and metal, not home exteriors.
Spot treatments and when to skip the machine
Not every stain requires a pressure washer. For small patches, manual cleaning often works better.
- Apply cleaner to the stain and let it sit per product instructions.
- Scrub gently with a nylon brush or sponge.
- Rinse with a garden hose and inspect the area.
Spot cleaning avoids unnecessary risk and conserves water and chemicals.
When hiring a professional makes sense
Call a pro if your house is tall, siding is aged, or mold is widespread. Experienced contractors know safe pressures and approved chemicals.
- Ask about their maximum PSI and whether they use soft-wash systems.
- Request references and photos of past vinyl siding jobs.
- Confirm they protect landscaping and follow environmental rules for runoff.
Professionals can also spot hidden damage early and recommend repairs before cleaning.
Signs that vinyl siding has water-related damage
- Interior wall stains or bubbling paint below siding lines.
- Soft or discolored sections of sheathing behind the siding.
- Musty odors in the attic or inside walls.
- Loose trim, peeling caulk, or visible gaps at windows.
If you notice any of these, inspect further before cleaning. Pressure may worsen existing issues.










