Show summary Hide summary
Want a fast, budget-friendly fall craft that looks charming on a porch or in a garden? A simple pumpkin shape cut from leftover boards gives you cozy autumn decor. This project turns spare slats and pallet pieces into seasonal accents you can paint, stain, or leave weathered.
What you need to build a pumpkin from scrap wood
Washing machine cold water not working: quick fixes to try now
scrap wood pumpkins: gardener turns junk into diy fall decor you’ll want to recreate
Gather small tools and reclaimed lumber before you start. Most items are likely in a shed or garage.
- Wood options: pallet boards, old fence pickets, thin plywood, or a broken headboard.
- Jigsaw or handsaw.
- Drill and screws, or hammer and nails, or strong wood glue.
- Sandpaper for rough edges.
- Paint, stain, and simple embellishments like ribbon or faux leaves.
- Small stick or dowel for the stem; rope if you want to hang the piece.
How to assemble a rustic wooden pumpkin
Work in a well-ventilated area. Clear nails and inspect every board. Toss pieces that are soft or crumbly.
- Disassemble pallets carefully if using one. Remove stray nails and staples.
- Sort boards by height and thickness. Minor cosmetic marks add character.
- Line up several boards side by side until they form the desired width.
- Attach a longer board across the back, perpendicular to the slats, using screws or nails.
- Trace a pumpkin outline across the front slats. Use a simple oval or a more classic ribbed shape.
- Cut along your lines with a jigsaw. If cutting feels risky, leave the top and bottom straight and fake the curves with paint.
- Fasten a small block or dowel at the top for a stem. Glue a back block to make it stand upright.
Quick variations to save time
- Make several small pumpkins by using fewer boards per piece.
- Create a door hanger by swapping the stem for a loop of rope.
- Turn a pumpkin into a yard sign by attaching a post at the base.
Finishing and styling: paint, stain, and accents
How you finish the pumpkin determines its vibe. Bright paint gives a playful look. Natural stain keeps a farmhouse feel.

- For a classic pumpkin, paint in shades of orange and add darker brush strokes to suggest ribs.
- Want rustic charm? Sand edges and use a matte stain or diluted paint wash.
- Add faux leaves, ribbon, or tiny pumpkins clustered at the base for a layered display.
- Use exterior paint or sealant for pieces that will stay outdoors.
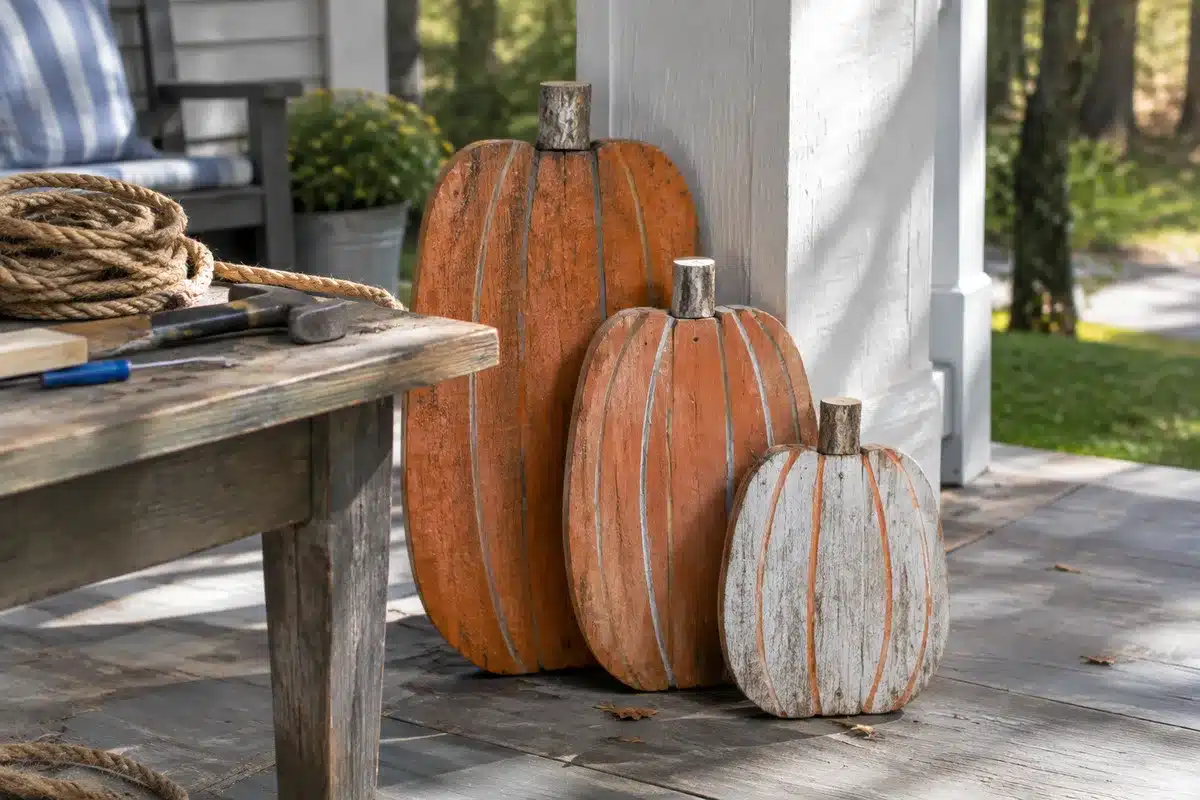
One creative shortcut: leave several pumpkins in different sizes and hues to form a mini patch on a stoop.
Practical tips for working with reclaimed wood
- Inspect every board. Rot and excessive splits weaken the structure.
- Wear gloves and eye protection when dismantling pallets.
- Use scrap pieces for testing paint and cutting patterns first.
- If you plan to bring pumpkins indoors, scrub and dry the wood thoroughly.
Inspired ideas for displaying your handmade pumpkins
These pieces are versatile and scale easily to your space. Mix textures and sizes to add depth.
- Lean a trio of pumpkins against a porch post.
- Create a shelf vignette with a painted pumpkin, a candle, and seasonal foliage.
- Cluster them at the base of a planter or along a garden path for a playful touch.
Many makers on social platforms have shared versions of this craft. Gardener and creator mrsclarehoops posted a popular clip showing how quick the build can be, and it inspired a wave of similar DIYs across autumn feeds.