
Show summary Hide summary
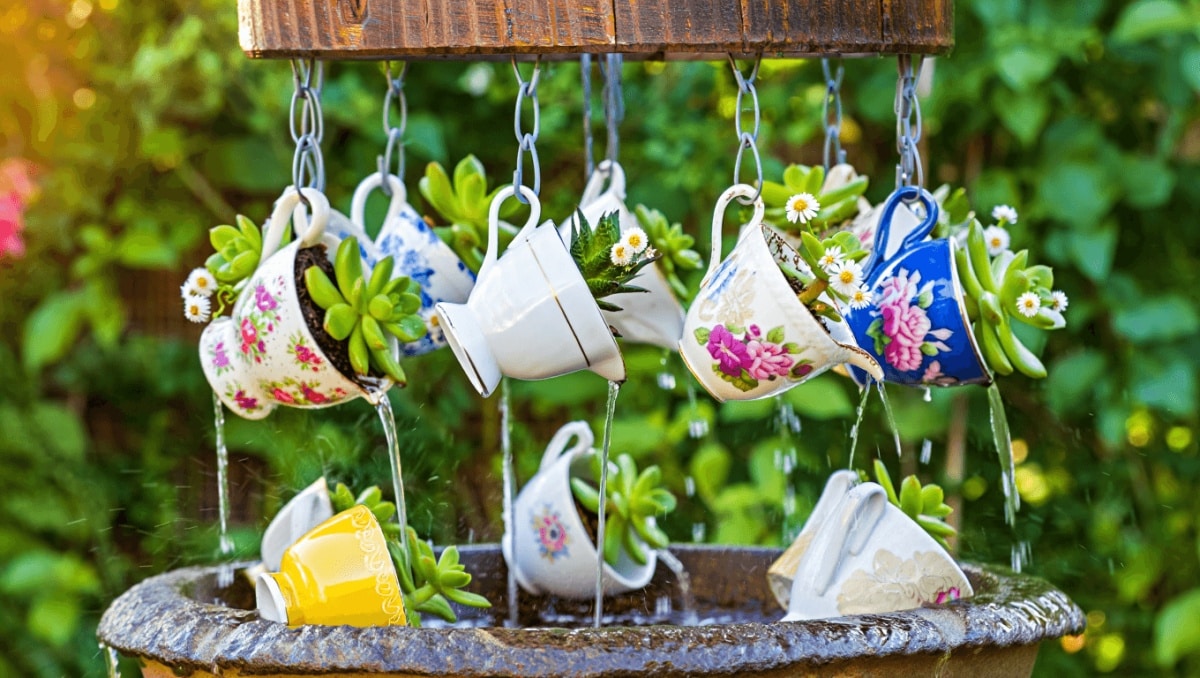
Vintage teacups have found a second life beyond shelves and cabinets. A creative DIYer transformed thrifted china into a whimsical rain chain that channels roof runoff with charm. It’s a simple project that blends function and nostalgia, and it’s catching on with gardeners and makers who love playful, sustainable decor.
Why teacup rain chains are capturing attention
Rain chains are a decorative swap for metal downspouts. Instead of water rushing through a concealed pipe, it tumbles visibly along linked cups or chains. That visual motion and gentle sound add atmosphere to any yard.
Michaels holiday finds under $25: 20 new gifts that look like $50
Target wall-mounted find frees up countertop space: timeless style for small kitchens
Repurposing teacups gives this idea a storybook twist. Old cups bring color, pattern, and personality. They also turn a practical item into an eye-catching focal point that people remember and photograph.
What you need to build one
Essential materials
- Thrifted or unused teacups and saucers
- Outdoor-rated chain (aluminum or copper recommended)
- Heavy-duty zip ties or stainless steel wire
- Rotary tool or drill with diamond-tipped drill bit
- Bolt cutters or metal snips to size the chain
- Gutter adapter for rain chains or a sturdy hook
- Optional: rain barrel or container to collect water
Tip: Choose cups without hairline cracks. Metal chain that won’t rust will last longest outside.
Step-by-step: turning cups into a functional rain chain
Preparing the cups
- Mark the center of each cup’s base with a pencil.
- Secure the cup in a clamp or padded vise so it won’t move.
- Using a diamond bit on low speed, carefully drill a hole through the base.
- Pause often and cool the bit with water to prevent cracking.
- Start small and widen gradually until a zip tie fits comfortably.
Assembling the chain
- Cut the outdoor chain into equal lengths with bolt cutters.
- Space cups several inches apart for a balanced look.
- Thread a zip tie down through a cup hole and loop it through the top link below.
- Bring it back up through the cup and loop it to the bottom link above.
- Tighten the zip tie snugly and trim excess.
- Repeat until all cups are linked into a single strand.
Safety note: Wear eye protection while drilling and cutting. Handle ceramic shards carefully.
How to hang and place your rain chain
Install a compatible gutter adapter to attach the chain where a downspout would be. If a gutter is not available, use a strong hook on a roof edge, beam, or post. A shed corner or a sturdy tree branch works, too.
Position a barrel or basin beneath the final cup to collect water for irrigation. This turns the feature into a waterwise addition for beds and containers.
Design ideas and variations for garden styling
- Mix cup sizes and patterns for a vintage, eclectic look.
- Pair matching saucers below cups to catch and re-route splashes.
- Paint the chain or age it naturally for contrast with porcelain.
- Use tiny flower pots or metal cones instead of cups for a modern take.
Hang the chain near a seating area to enjoy the soothing sound of falling water.
Maintenance and seasonal care
- Check zip ties and connections each season.
- Remove and store fragile cups during freezing weather.
- Clean mineral buildup from cup holes and chain links periodically.
Pro tip: Replace plastic ties with stainless steel wire for a cleaner look and longer lifespan.
Why this DIY resonates with gardeners and thrifters
The project marries sustainability, thrift-hunting, and creative design. It lets makers reuse ceramics that might otherwise be discarded. Viewers often react with delight at the pairing of function and whimsy. One admirer even called the finished piece “so stinkin’ cute,” a reaction that sums up the charm of turning everyday finds into garden art.










