
Show summary Hide summary
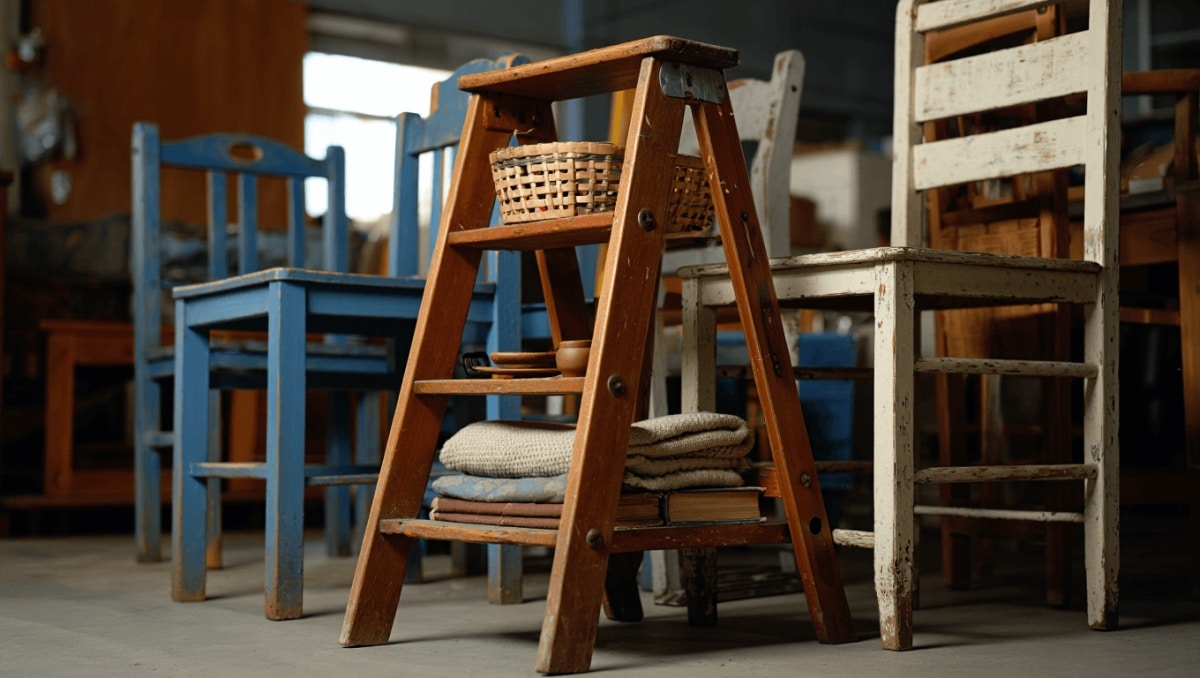
A weathered step ladder shoved between mismatched chairs can be the start of a standout storage solution. Skip the predictable baskets and flat bookcases. With a few cuts of scrap wood and simple hardware, an A-frame or step ladder from a thrift shop can become a charming, budget-friendly shelving unit that doubles as decor.
Why a thrifted ladder makes smart storage
Repurposing an old ladder is both eco-conscious and economical. It turns a common found object into a focal piece. The angled profile of an A-frame ladder gives shelves natural depth and a sculptural silhouette.
Michaels holiday finds under $25: 20 new gifts that look like $50
Target wall-mounted find frees up countertop space: timeless style for small kitchens
- Cost-effective: You often pay far less than for a new unitary bookshelf.
- Unique look: Vintage wood or chipped paint adds character you can’t buy off the shelf.
- Custom sizing: Shelves can be cut to fit the ladder’s own proportions.
Where to source the perfect ladder
Not every secondhand ladder is right for the job. Look for one with solid joints and a usable A-shape. Check local thrift stores, salvage yards, and nonprofit home stores first.
- Community resale shops and Habitat for Humanity ReStores.
- Online classifieds and buy-nothing groups.
- Garage sales and estate sales for older, characterful pieces.
If you find a ladder with cosmetic flaws, remember those marks can enhance the final look. Structural integrity matters more than appearance.
Inspecting and preparing the ladder
Before buying or converting, test the ladder in person. Place it on a flat surface and check for wobble. Shim or trim legs if needed later, but avoid a frame with cracked rails.
Quick checklist
- Are the rails solid and free of major splits?
- Do rungs hold fast when pressed?
- Can loose joints be tightened with screws or glue?
For ladders that never need to bear a person, even old wood can work. Tighten weak joints and reinforce rungs where shelves will rest.
Materials and tools you’ll need
- Scrap or new boards for shelves (pine, plywood or reclaimed wood).
- Brackets or small cleats to secure boards to rungs.
- Wood screws, drill, circular saw or hand saw.
- Sandpaper, stain or paint, and a measuring tape.
- Optional: trim for shelf lips, LED strip lighting.
How to measure, cut, and install shelves
Measure each rung opening individually. An A-frame narrows toward the top, so shelf widths should step down accordingly. Plan for slight overhang to preserve the ladder’s triangular shape.
- Set the ladder A-shaped with the front facing you, rails flush to the wall.
- Measure the distance between rails at each rung level.
- Cut boards a few inches wider than that distance for a layered look.
- Sand and finish boards before attaching.
- Secure shelves using brackets, cleats, or by screwing through the rungs into the underside of each board.
Where rungs are missing on one side, add short support pieces and screw them into place. Even lightweight screws and brackets dramatically increase stability.
Finishing touches and safety upgrades
Small details make the difference between a project and a polished piece. Add trim to create a lip and prevent items from slipping. Anchor the ladder to the wall with straps or brackets if you plan to display fragile or heavy objects.
- Paint or stain to match room decor.
- Trim or beadboard on shelf fronts for a clean edge.
- LED strips for under-shelf illumination.
- Baskets on lower shelves for concealed storage.
Always anchor tall or freestanding units in homes with kids or pets.
Styling ideas to make the ladder shelf work in any room
Ladders adapt well to entryways, living rooms, bathrooms, and even kitchens. Use the tiers to layer objects by size and color. Mix functional storage with decorative accents.
- Bottom shelves: baskets, shoes, or bins for daily use.
- Middle tiers: framed photos, books, and mid-size plants.
- Top rungs: lightweight decor or a small sculpture.
Alternate shelf overhangs left and right for a playful rhythm, or keep each shelf centered for a clean, architectural look.










