
Show summary Hide summary
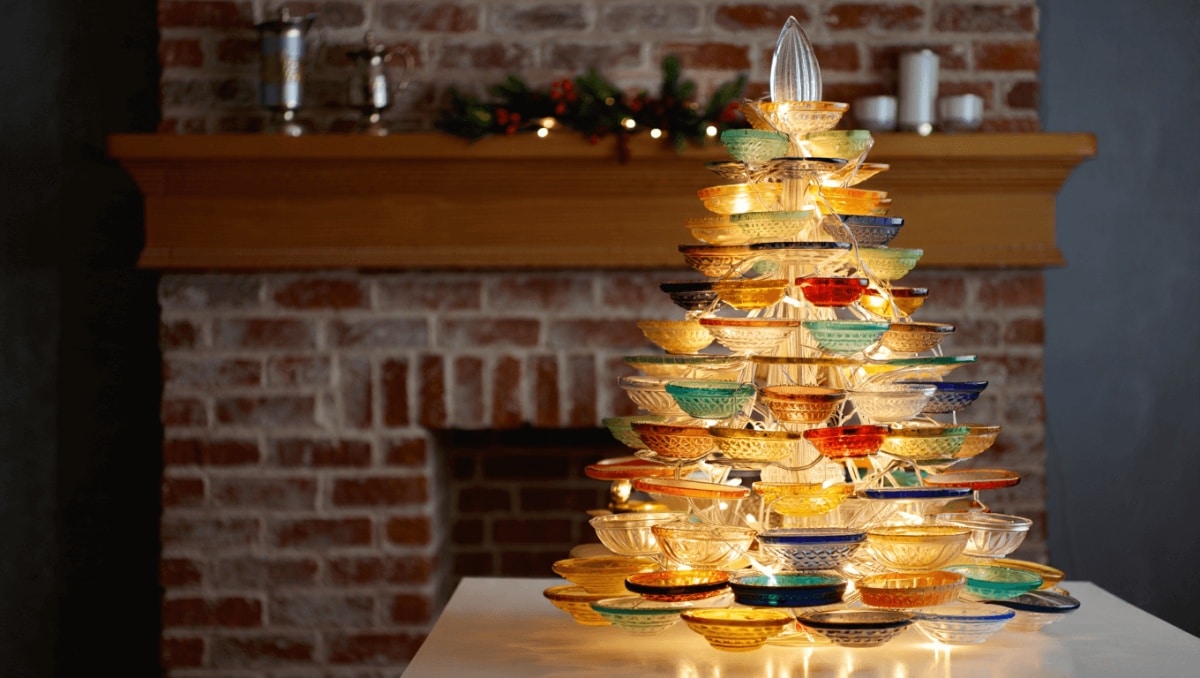
Turn a bargain-hunt into a holiday centerpiece by transforming thrifted glass plates and bowls into a glowing, stacked Christmas tree. This simple upcycle is budget-friendly, eco-aware, and makes a memorable gift or mantelpiece. With a few tools and some careful stacking, ordinary secondhand glass can become a chic illuminated ornament that looks store-bought.
Why thrift-store glassware is perfect for DIY Christmas trees
Thrift shops often carry an eclectic mix of plates, bowls, and candleholders. Their shapes and sizes lend themselves to tiered designs. Using secondhand glass keeps costs low and reduces waste.
Michaels holiday finds under $25: 20 new gifts that look like $50
Target wall-mounted find frees up countertop space: timeless style for small kitchens
- Glass reflects and diffuses light beautifully.
- Varying diameters create a natural tapered silhouette.
- Clear or colored pieces offer instant style without extra paint.
Scouting tips: look for items without big chips and prefer pieces with flat contact points for better adhesion.
Materials and tools to gather before you build
Having the right supplies makes the assembly safe and stable. You don’t need a lot, but quality adhesive and padding matter.
Essentials
- Assorted glass plates, bowls, or jars of graduated sizes
- Strong glass-friendly adhesive (for example, E6000 or similar)
- Battery-operated fairy lights or a small LED candle
- A small level to check each layer
- Soft cloths and rubbing alcohol to clean bonding surfaces
Helpful extras
- Thin felt pads to separate and protect layers
- Rubber gloves and a ventilated workspace
- Small ornaments to hide a battery pack
Safety note: follow adhesive instructions, work in a ventilated room, and allow full curing time before moving the piece.
Step-by-step: how to assemble a stacked glass Christmas tree
Plan your silhouette by laying pieces on the table from largest to smallest. The order you choose defines the finished profile.
- Clean each piece with rubbing alcohol to remove oils and dust.
- Start with a stable base, such as an overturned bowl that can cradle lights or a battery pack.
- Apply a thin bead of adhesive where two glass surfaces will meet. Press and hold briefly, then use a level to confirm alignment.
- Alternate plates and bowls, flipping most pieces upside-down so rims sit flush against flat surfaces.
- As you stack, switch to progressively smaller dishes to create a tapered tree shape.
- Top the stack with a small tall bowl, candleholder, or ornament. Secure it with adhesive.
- Let the adhesive cure fully before adding any lights or moving the decoration.
Pro tip: hide the battery pack inside the base bowl, and camouflage it with a few thrifted ornaments.
Lighting and styling choices to elevate the look
The way you light and finish the tree determines the mood. Warm white lights read classic. Colored LEDs produce a playful vibe.
- Wrap a 50- to 100-LED warm string inside and between layers for a subtle glow.
- Place a small LED candle in the base for a soft center light.
- Attach a tiny ornament or miniature star to the top to act as a topper.
Keep it safe: use battery-operated LEDs rather than open flames near glued glass.
Paint, color, and creative finishes for different aesthetics
You can leave the glass clear or add color, texture, and seasonal detail. Options range from simple to craft-forward.
- Glass paint: apply translucent hues for a stained-glass effect.
- Frosting: use frosted glass spray for a wintry, diffused glow.
- Sea-glass look: mix acrylic enamel with Mod Podge for a matte, worn finish.
- Layered colors: paint each tier in a different shade to make a playful centerpiece.
Decoration idea: paint tiny ornaments or garlands onto each plate for a festive, hand-drawn touch.










