Show summary Hide summary
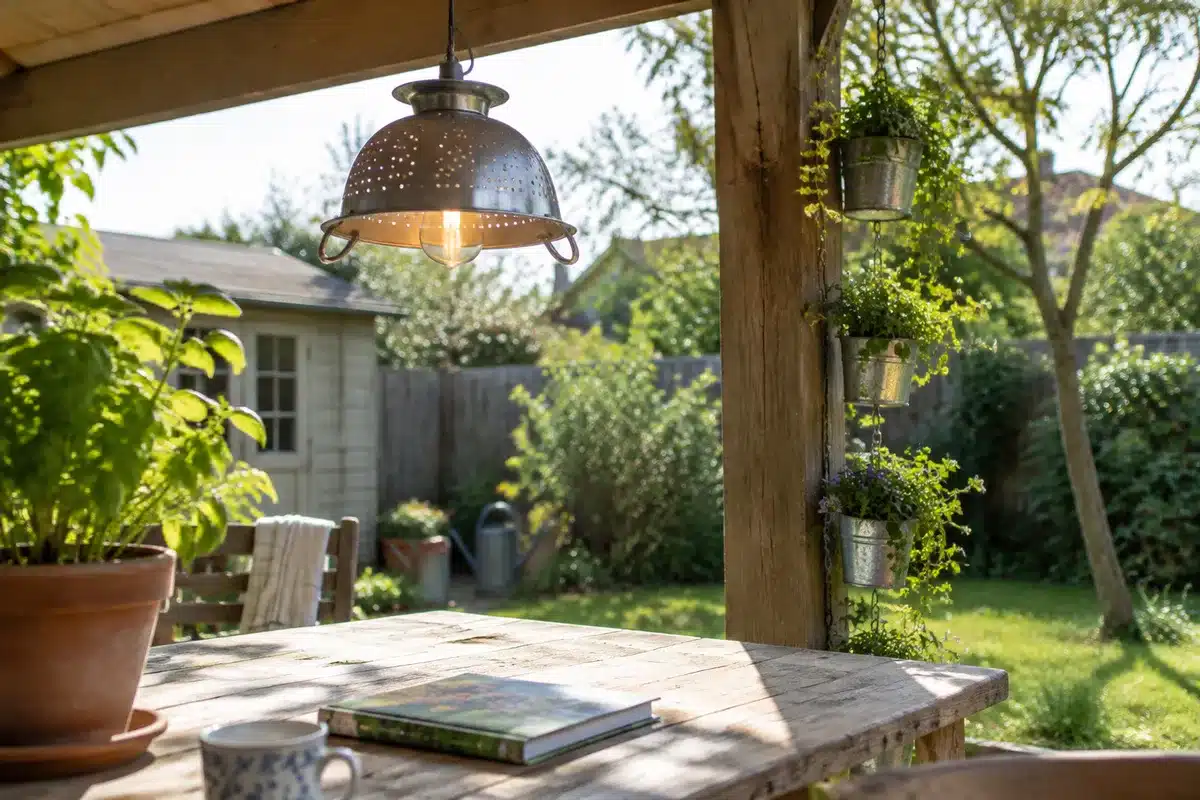
Give your worn kitchen colander a second life as a chic outdoor light. With a few inexpensive supplies and basic tools, you can craft a stylish DIY solar lamp that brightens patios and walkways without wiring. The project is fast, budget-friendly, and perfect for small-space gardeners and thrifty decorators.
Quick shopping list for a budget-friendly colander lamp
DIY solar lamp from an old colander: easy, stylish upcycle anyone can make
Riding mower grinding sound: what it means and how to fix it
- Plastic or metal colander — reuse one you already own or buy for about $1.25 at Dollar Tree.
- Small solar garden light or battery-powered LED puck light.
- Plant-hanging chain or planter pot chain to suspend the lamp.
- A can of outdoor-rated spray paint; metallic inside paint boosts reflectivity.
- Cutting tool: sharp kitchen scissors for plastic, or a Dremel/rotary tool for metal.
- Optional: E6000 adhesive, zip ties, thin fairy lights, faux flowers, hot glue.

Step-by-step: How to make a colander solar lamp
1. Prepare the colander
Start by removing the outer rim so the colander has a clean hanging edge. Plastic trims easily with sharp scissors. For metal colanders, use a rotary cutting tool and wear safety glasses.
2. Make the light opening
Cut a hole in the center of the colander base so the solar light fits snugly. Aim for a tight fit so the puck won’t wobble. Test the fit before painting.
3. Paint for style and brightness
Choose a color that matches your outdoor decor. Spray the outside for the look you want. Use a metallic or light-reflective finish inside to boost the lamp’s glow.

4. Insert and secure the solar light
Once paint dries, push the solar unit into the hole. For windy locations, add a small dab of E6000 to keep it in place. Use minimal adhesive to make future battery swaps easier.
5. Hang it like a chandelier
Clip three or four equal lengths of planter chain to the colander rim. Space them evenly so the colander hangs level. Connect to a central hook, shepherd’s hook, or porch bracket.
Quick assembly checklist
- Trim rim → cut hole → paint → insert light → attach chains → hang.
- Place the lamp where it will get sunlight for charging.
Design ideas to personalize your colander lamp
- Combine two or more colanders with zip ties to make a globe-shaped fixture.
- Weave a thin strand of fairy lights through the holes for extra sparkle.
- Glue plastic faux flowers around the rim for a cottage look.
- Mix in other kitchen pieces—like a small grater—for a quirky, recycled sculpture.
- Swap the solar puck for a battery LED if the lamp’s location gets limited sun.
Small touches change the mood: matte paint gives a modern feel; brushed metallics read upscale.
Durability, placement, and weather advice for outdoor use
- Choose outdoor-rated spray paint and a solar light designed for exterior conditions.
- Avoid silk or fabric flowers outdoors; use plastic alternatives that withstand moisture.
- If storms or harsh winters are common, take the lamp inside for severe weather.
- Inspect adhesive and fastenings yearly and replace batteries as needed.
Mount the lamp under a roof overhang or in a protected porch if you want less maintenance. For full-sun exposure, a stake-mounted solar light can be adapted instead of a hanging puck.